Latest Posts


Use protect button lock/Unlocking an SD Card
When trying to use one wholesale SD card, you may sometimes get an error that tells you that the flash disk is “write-protected.” Disks that are write-protected will stop you from copying, deleting, or writing new data to the disk. To remove the write protection on an SD card, you may need to physically unlock the card or format the card using a Windows or Mac computer.
Method 1 of 3: Unlocking an SD Card
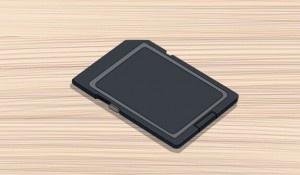
1. Place the SD card on a flat surface with the label facing up.
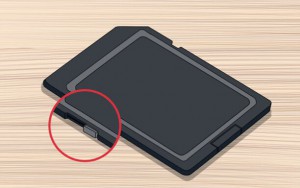
2. Check the lock switch on the upper-left side of the SD card.
The lock switch may be a tiny white or black tab that juts out from the left side of the SD card. If you are using a micro SD card, there will be no lock switch on the actual SD card. Instead, you will be required to insert the Micro SD card into an SD card adapter, which will contain a lock switch.
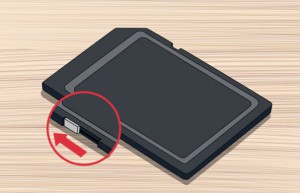
3. Slide the lock all the way up. The write-protection status will now be removed from your SD card.[1]
Method 2 of 3: Formatting an SD Card using Windows
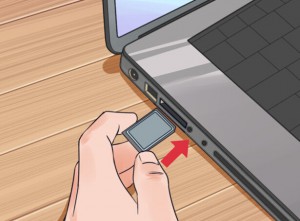
1. Insert your SD card into your Windows computer.
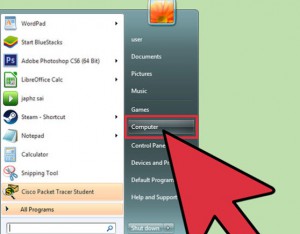
2. Click on “Start” and right-click on “Computer.”
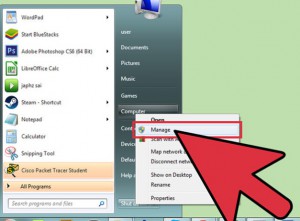
3. Select “Manage” from the list of options displayed.
The Computer Management window will display
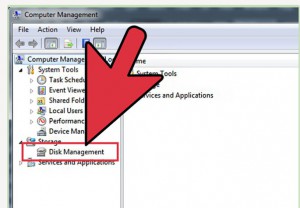
4. Click on “Disk Management” below “Storage” in the left pane of Computer Management.
All the storage devices you are currently using will display in the middle pane.
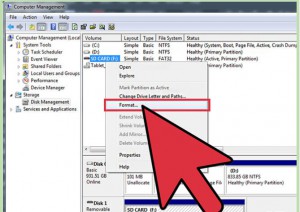
5. Right-click on the storage device you want formatted and select “Format.
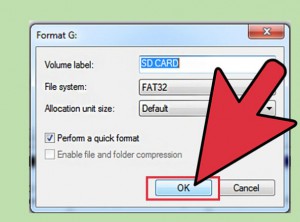
6. Click on “OK.”
Your computer will then format your SD card and remove the write-protection status from the disk. [2]
Method 3 of 3: Formatting an SD Card using Mac OS X
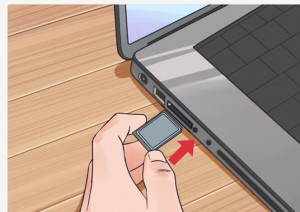
1. Insert the SD card into your computer using an SD card reader or adapter.
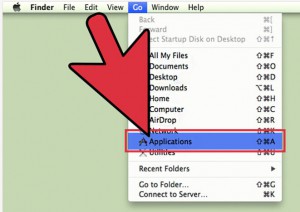
2. Open the Applications folder on your Mac.
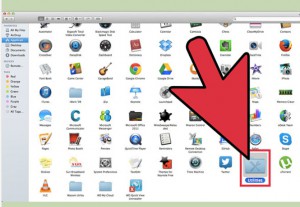
3. Scroll to the bottom of the Applications folder and open “Utilities.”
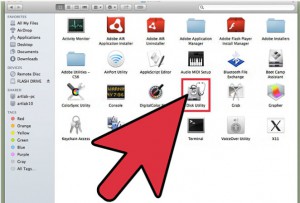
4. Click on “Disk Utility.”
The Disk Utility window will display.
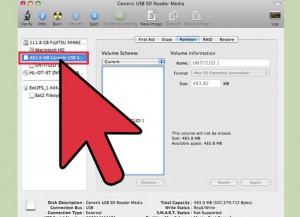
5. Click on the name of your SD card in the left pane of Disk Utility.
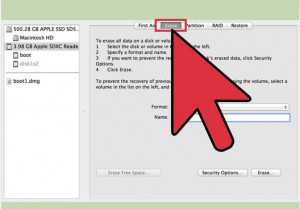
6. Click on the tab labeled “Erase” near the top of the Disk Utility window.
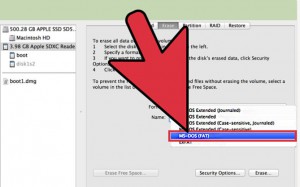
7. Select “MS-DOS file system or exFAT” from the dropdown menu next to “Volume Format.”
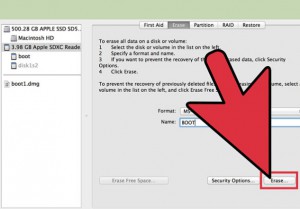
8. Click on the button labeled “Erase” near the bottom of Disk Utility.
Your Mac will then format and erase all the contents on your SD card, and remove the write-protection status.[3]
Warnings
- In some cases, the lock switch on your SD card may become excessively loose and slide into the lock position by accident when you insert the card into a computer or device. If this occurs, you may need to completely replace your SD card.
- Try nudging the protection tab. Be sure the protection tab is in the unlocked position. Nudge it 0.5mm toward the locked position. Insert and test. This will often produce positive results.
- Formatting your SD card will completely erase all its contents. If you want to avoid losing any data you have saved on the card, attempt to toggle the lock switch on the SD card to its unlock position before formatting the disk.
Leave a comment